
Banner
Tutorial:
(
To be able to make a banner like this, you will need “Jasc Animation Shop
3”. To buy this program click here!
)
Follows these
simple steps to complete an AWESOME banner!
Step
1.
First, you will need to open Jasc Animation Shop 3. Once there, go up to
file and 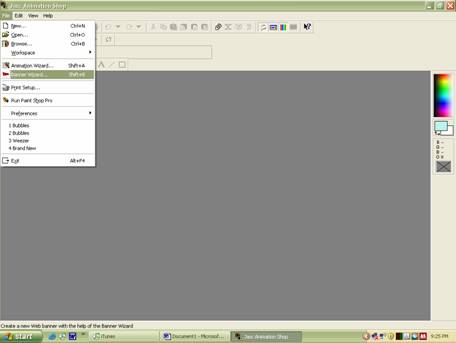
click on “Banner Wizard”
2.
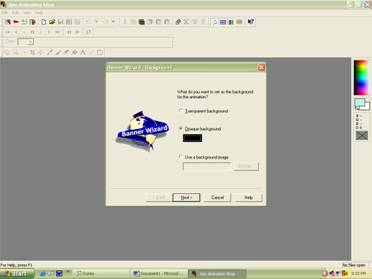
Next, click on the “Opaque Background” radio button. Leave the
“Transparent Background” alone. Then, click on the box right below “Opaque
Background, and choose a color. Do not click on the “Use Background Image”
radio button.
I decided
to
choose black for my banner’s background.
Finally, click Next.
3.
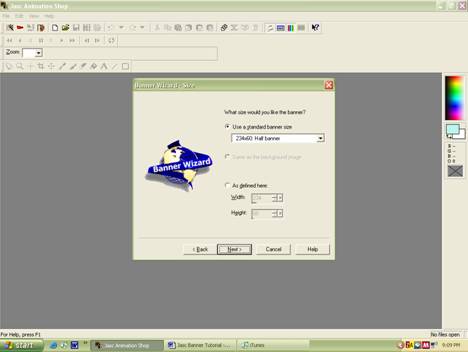
This
is where you choose the size of your banner these are the different sizes:
468x60 is a Full Banner. 234x60 is a Half Banner. 72x392 is a Full,
vertical navbar, which I don’t recommend using. 120x240 is a Vertical
banner; I don’t like the vertical personally. 125x125 is a Square
button. And, 88x31 is a Micro Button.
I am using a Half Banner size. Also, you can use a banner with the length and width of your choice. In my opinion, I like to use a pre-made banner size. Once you are happy with your banner size choice, click Next.
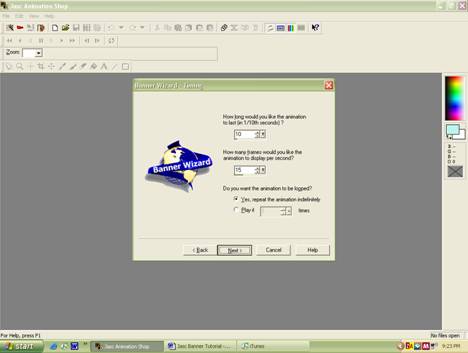
4.
On
the next page, I like to put the numbers 10 and 15 in the two boxes that you can
see. The first box indicates how long the animation will last in one 10th
of a second. The next box tells how many frames will be played in second. Under
how long the animation should be looped, click on the “Yes, repeat the
animation indefinitely” radio button. Unless, of course, you want the banner
to stop it’s animation eventually. Once you are done click Next.
5.
This
is where you can add your text to you banner! WooT WooT! You can add whatever
you want the banner to say. In my case I am going to have my banner say:
GrafikGorilla.com
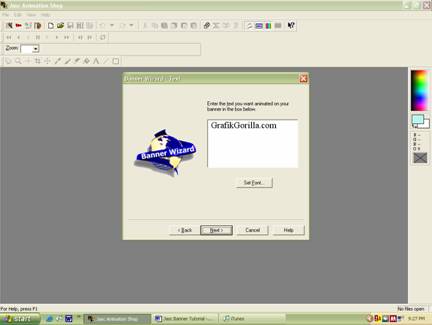
(Still
Step 5!). That’s a pretty boring font to add to a banner though Eh? Well to
spruce it up just click on the “Set Font” Button it will take you to a page
that looks like this:
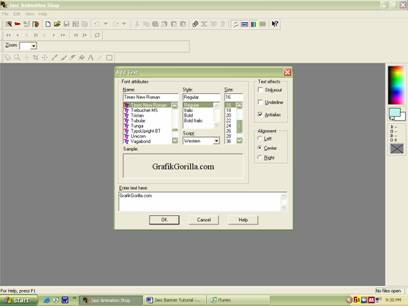
(Still
Step 5!). Now just change whatever you want! Just make sure that under “Text
Effects” on the right that “Antialias” is checked. And under
“Alignment” that “Center” radio button is checked. Once you have your
font set, click Ok. Tubular
is the font I used for my banner.
6.
Now it’s time to change the color! Just like before, click on the box under
“Opaque”. A window like this should come up:
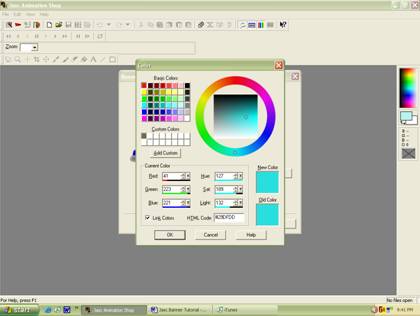
(Still
Step 6!). Now, just adjust the wheel and squares until you find the color that
you want your writing to be. My color looks is pretty close to this one:
HELLO. Once you are happy with your color choice, click Ok. Then, on the
page that was behind, you should see the color that you chose inside the box.
7.
Now you will see your newly made banner!!! There are many different effects that
you can make your banner do. They are all in the dropdown menu under
“Transition Name” You can also click customize to change the different
effects to make them look even more diverse such as with color. EXPERIMENT! Once
you find the perfect match to complete you amazing banner, save it! Just click
finish, and you will see your banner frame by frame.
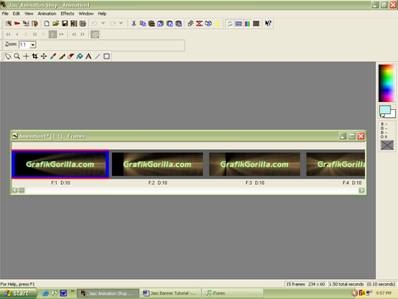 Pretty sweet eh?
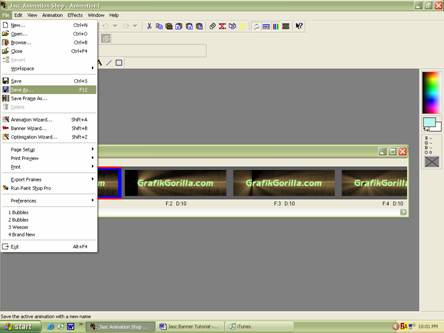
(Still
Step 7!). Now go up to file and “Save As” and do what you will with your
newly created amazing BANNER!
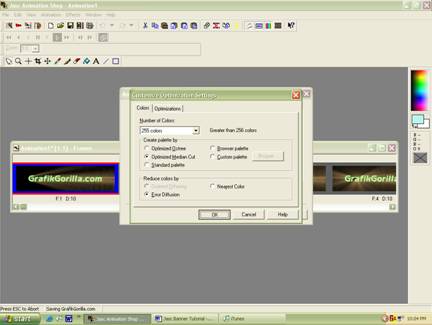
(Still Step
7!). Now a new page should some up. Click “Customize” and make sure that
under “Number of Colors” “255 colors” is shown. If not, then pull that
up from the dropdown menu. Then click Ok.
8.
Just click Next until a Finish button comes then you are done! Just be sure that
your banner was saved to wherever you saved it.