Most of the fun with oatmeal-box pinhole cameras happens in the dark. The actual photographs are made in the darkroom, and they are 5 x 7 inch prints, not little wallet-sized pictures! A few supplies are needed for the darkroom, in addition to the safelight mentioned earlier. Here's a list:
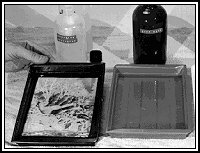
three 5x7 developing trays
developer (Kodak Dektol - comes in quart and larger sizes)
stop bath (optional - clean water may be used instead) (Kodak Indicator Stop Bath or Acetic Acid)
fixer (very important-Kodak Fixer is least expensive, comes in quart and larger sizes)
sheet of plate glass large enough to cover 5 x 7 paper--must have edges ground so they are not sharp
white light (a 15 watt bulb on a cord with a line switch is recommended. The room light can be used, but it is usually more difficult to control. Test it out first--you will probably want to use the 15w. bulb instead
clean towels, but not "Mom's best"
recommended: plastic photographic chemical bottles to keep solutions in (sold at photo supply stores)
These chemicals are common darkroom chemicals for black and white print developing. They are not toxic under normal use but injestion is not recommended. Read all manufacturer's labels and cautions before using.
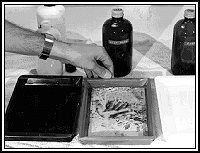
 Here
you see the negative of a hand in a pile of leaves as it develops in the developer tray.
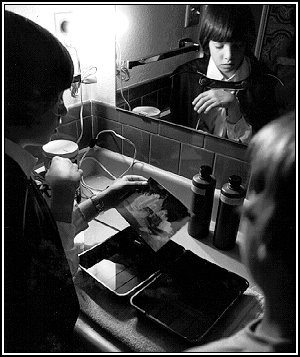
Under the safelight, remove the exposed film from the camera and place it in the developer
tray. Gently rock the tray so that a wave of developer washes back and forth across the
film. When it looks dark enough, pick the film up by one corner and let it drip for a few
seconds. Then place it in the second tray, the stop bath (or water, if so desired.)
Here
you see the negative of a hand in a pile of leaves as it develops in the developer tray.
Under the safelight, remove the exposed film from the camera and place it in the developer
tray. Gently rock the tray so that a wave of developer washes back and forth across the
film. When it looks dark enough, pick the film up by one corner and let it drip for a few
seconds. Then place it in the second tray, the stop bath (or water, if so desired.)
 Again,
rock the stop bath tray for about ten seconds (this is called "agitating"), lift
up the negative and let it drip, then place it in the fixer tray. Agitate the fixer tray
for at least two minutes. Fixing the image is very important: the fixer dissolves out any
silver which hasn't turned black, so that years from now, the picture won't turn yellow or
some other unwanted color. Sometimes improperly fixed photographs just fade out, as if
they were bleached by time. After a minute of agitated fixing, it is OK to turn on the
room light--after first checking to see that the photographic paper is covered!
Again,
rock the stop bath tray for about ten seconds (this is called "agitating"), lift
up the negative and let it drip, then place it in the fixer tray. Agitate the fixer tray
for at least two minutes. Fixing the image is very important: the fixer dissolves out any
silver which hasn't turned black, so that years from now, the picture won't turn yellow or
some other unwanted color. Sometimes improperly fixed photographs just fade out, as if
they were bleached by time. After a minute of agitated fixing, it is OK to turn on the
room light--after first checking to see that the photographic paper is covered!
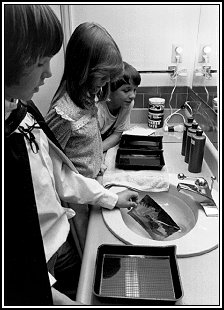 The
last "wet" processing step is to wash the photographic paper in clean, room
temperature water for about four minutes. This step is very important, too, because if any
fixer is left in the paper, it will act like a bleach and cause the photographic image to
fade over time. Room temperature water is important because water which is too hot or too
cold can damage the layers which make up the photographic paper. Last, pat the paper dry
with paper towels or with a clean cloth towel and set the paper on a clean space where it
will quickly dry.
The
last "wet" processing step is to wash the photographic paper in clean, room
temperature water for about four minutes. This step is very important, too, because if any
fixer is left in the paper, it will act like a bleach and cause the photographic image to
fade over time. Room temperature water is important because water which is too hot or too
cold can damage the layers which make up the photographic paper. Last, pat the paper dry
with paper towels or with a clean cloth towel and set the paper on a clean space where it
will quickly dry.

Back - Home - Next