Making the
"Pinhole Drill"
Instead of having a glass lens like
"normal" cameras, the pinhole camera uses a tiny hole, a needle-sized hole, to
form the picture inside the camera. The best size of pinhole for this camera body is one
which is 1/100th of an inch in diameter. There is a fine needle which is that size--the
#16 beading needle. Because the needle is small and difficult to handle, it must be glued
into a handle to make a "pinhole drill." As illustrated below, the drill is easy
to make, and once prepared, it can be used to make hundreds of pinholes in the soft
aluminum stock cut from soft drink cans.
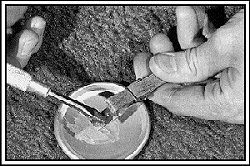 Mix
the epoxy in the cut-off end cap of a soft drink can. Place epoxy in the mouth of the
clothspin and insert the needle until it protrudes about 1/4 inch. You may have to cut the
back of the needle off to make it fit into the clothspin. If the needle protrudes more
than about a quarter inch, it will easily break off when used to drill pinholes.
Mix
the epoxy in the cut-off end cap of a soft drink can. Place epoxy in the mouth of the
clothspin and insert the needle until it protrudes about 1/4 inch. You may have to cut the
back of the needle off to make it fit into the clothspin. If the needle protrudes more
than about a quarter inch, it will easily break off when used to drill pinholes.
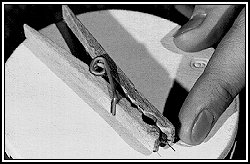 The
finished "pinhole drill" should look like this: notice the 1/4 inch length of
the drill shaft.
The
finished "pinhole drill" should look like this: notice the 1/4 inch length of
the drill shaft.
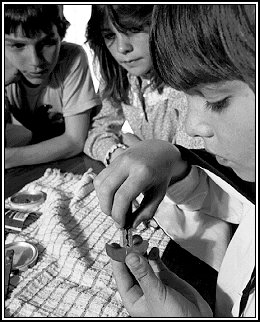
Here you see the delicate task of
drilling a pinhole in the aluminum plate. This is an important part of making a pinhole
camera. It requires a delicate touch and a bit of patience. A fine pinhole will result in
sharp photographs and will last for centuries! Following are the steps for using the
"pinhole drill" to make a fine-quality pinhole lens.

Back - Home - Next