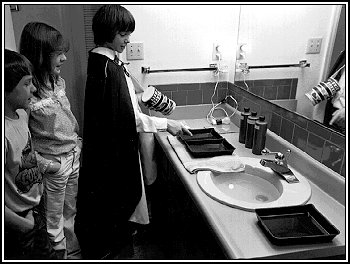
Here is an example of a simple pinhole darkroom set up at home. The first requirement is that the room be totally DARK when the door is closed and the lights turned off. Photographic film is sensitive to all except red/orange light and can be ruined in a fraction of a second if exposed to white light. The black trays will be used to develop the film after a picture is taken. For now all we need is a darkroom and a "safelight", plus some "paper film."
A few supplies are needed to load the pinhole camera in the darkroom. Besides a dark room, "paper film" is a must. What is "paper film?" Resin-coated 5x7 inch black and white photographic paper, medium contrast, is what we will use for film in the pinhole camera. Since photographic paper is coated on paper instead of transparent plastic, it is "paper film." It works exactly the same way as regular film, but is less expensive and can be handled with special light in the darkroom. The special light is called a "safelight" because its light is safe--it will not ruin the paper film. Photographic supply stores will have the photographic paper (5x7 resin-coated, medium contrast, in packs of 25 or 100 sheets) and the safelight. Safelights range from small bulbs the size of a nightlight to more expensive units designed for regular darkrooms. Be sure the safelight you get is really safe for the photographic paper you are using! Resin-coated photographic paper usually comes in both a glossy or a dull, matte finish. For use as film in the camera, the matte finish is better since it doesn't reflect as much light inside the camera. Either the matte or glossy finish photographic paper will work just fine for making prints, however. We'll get to printmaking later...
 Once
inside the darkroom with the lights turned off (except for the safelight, of course,
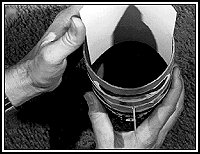
otherwise you would be in total darkness), remove the lid from the oatmeal box camera and
remove one sheet of paper film. Close the paper package before doing anything else,
because someone may turn on the light or open the door and let enough light in to ruin all
of your unexposed photographic paper! (You might do this yourself by accident.) Next,
check to be sure that the shutter handle is lined up over the pinhole marks. Determine
which side of the paper film is the "film" side (it is the most shiny side, and
if you wet a finger, the side which is "sticky" is the film side), then slide
the film in behind the pinhole with the 5-inch side up, the 7-inch going around inside the
camera, with the "film" side of the paper toward the pinhole. Center the paper
film on the shutter handle. If the film is loaded "crooked", you will get
off-center pictures, or parts of your subject will be cut off in the picture. After the
film is loaded correctly, put on the camera lid, check the photographic paper again before
turning on the room light, and carry the camera by the body, not by the lid because
the lid may pop off outdoors and ruin your film! (Some photographers tape the lid on or
put rubber bands around the camera to prevent the lid from accidentally popping off.) Now
it is time to go outside and "take" a picture! (Photographers don't
"take" anything but people's souls--they "make exposures" which
hopefully result in good photographs.)
Once
inside the darkroom with the lights turned off (except for the safelight, of course,
otherwise you would be in total darkness), remove the lid from the oatmeal box camera and
remove one sheet of paper film. Close the paper package before doing anything else,
because someone may turn on the light or open the door and let enough light in to ruin all
of your unexposed photographic paper! (You might do this yourself by accident.) Next,
check to be sure that the shutter handle is lined up over the pinhole marks. Determine
which side of the paper film is the "film" side (it is the most shiny side, and
if you wet a finger, the side which is "sticky" is the film side), then slide
the film in behind the pinhole with the 5-inch side up, the 7-inch going around inside the
camera, with the "film" side of the paper toward the pinhole. Center the paper
film on the shutter handle. If the film is loaded "crooked", you will get
off-center pictures, or parts of your subject will be cut off in the picture. After the
film is loaded correctly, put on the camera lid, check the photographic paper again before
turning on the room light, and carry the camera by the body, not by the lid because
the lid may pop off outdoors and ruin your film! (Some photographers tape the lid on or
put rubber bands around the camera to prevent the lid from accidentally popping off.) Now
it is time to go outside and "take" a picture! (Photographers don't
"take" anything but people's souls--they "make exposures" which
hopefully result in good photographs.)

Back - Home - Next