Recipes
[These will be changed and/or added to from time to time. Also note that more recipes are contained in the article
"Wild Plants I Have Known (and Eaten)". Last but not least,
check out the recipes for "Faux Gumbo" and
"100% Wild Salad" as recently prepared on the Victory Garden PBS TV show.]
Russ Cohen’s Hickory Nut Wafer Cookies
Ingredients
1 cup dark brown sugar (OK to substitute maple sugar)
6 tablespoons flour
1/4 teaspoon baking powder
1/4 teaspoon salt
2 eggs, beaten with 1/2 tsp. vanilla extract
1 1/3 cup chopped Shagbark Hickory Nuts (OK to substitute black walnuts, hazelnuts or other nuts)
Instructions
1. Set the oven rack in the middle position. Preheat the oven to 350°F. Prepare two 14-inch by 16-inch baking sheets by covering them with parchment paper or a silicone liner.
2. Combine brown sugar, flour, baking powder, and salt in a medium bowl. Add eggs and mix well. Fold in 1 cup of the hickory nuts (add the remaining 1/3 cup of nuts about halfway through using up the batter, to ensure all cookies are well-endowed with nuts).
3. Drop dough by teaspoons 2 inches apart on pans. Bake 15 minutes or until lightly browned. Place baking sheet on a rack and let cool 5 minutes. Transfer cookies to rack and cool completely. Cookies will crisp as they cool.
Makes about five dozen cookies.
Stinging Nettle Balls
Ingredients
10+ ounces cooked Nettle greens (can substitute Chickweed, Lamb’s Quarters or other spinach-like wild greens)
6 beaten eggs
3 cups stuffing (like Pepperidge Farm stuffing mix, or homemade)
1 tsp. garlic salt
1 tsp. pepper (can substitute dried, pulverized Spicebush berries)
3/4 cup melted butter
1 large onion, finely chopped (can substitute an equivalent amount of wild onions or leeks)
1/4 cup parmesan cheese
· Mix all the ingredients together and chill for at least 1/2 hour
· Roll into balls 3/4 to 1” in diameter
· Bake on ungreased cookie sheet for 20 minutes at 350ºF
· Serve warm; makes approx. two dozen
Russ Cohen’s Sour Cream Knotweed Crumb Cake
You’ll need to harvest Japanese Knotweed stalks at the “wild rhubarb” stage for this recipe, which typically shows up around the first week of May in the Boston area. Look for stalks about 18-24 inches long, select the fattest stalks you can (at least ¾ inch in diameter – they’re easier to peel that way), cut at ground level, lop off the top cluster of leaves and bring the stalks home. Once you’ve got them home, peel the very outer layer (which is stringy) off of each stalk; Japanese Knotweed stalks are hollow, though, so don’t peel too deeply or all you’ll have left is the hole. You can eat the peeled stalks raw if you want (their tart, juicy, crunchy texture and flavor is somewhat like that of a Granny Smith apple), or just chop them up for use in the recipe below or just about any other recipe calling for rhubarb.
Ingredients
For cake:
1 1/2 cups granulated sugar
3/4 cup butter, softened
3 eggs
1 1/2 teaspoons vanilla extract
2 1/2 cups all-purpose flour
2 teaspoons baking powder
1 teaspoon baking soda
3/4 teaspoon salt
1 cup dairy sour cream
5 firmly-packed cups peeled Japanese Knotweed stalk pieces (chop or knead the peeled stalks into small pieces <1” long), tossed with 1/2 cup flour, 1 teaspoon cinnamon, 1/4 teaspoon nutmeg and 1/4 teaspoon allspice in a bowl
For topping:
1/2 firmly-packed cup brown sugar
1/4 cup all-purpose flour
1 teaspoon cinnamon
1/4 teaspoon nutmeg
1/4 teaspoon allspice
1/4 cup cold butter, cut up into small pieces
Preheat oven to 350ºF. Grease a 13” by 9” baking pan.
Cake: Beat sugar and butter in a in a large bowl on medium speed until blended. Add eggs and vanilla and beat until creamy. Mix flour, baking powder, baking soda and salt in a bowl, then add to the creamed mixture alternatively with the sour cream, mixing well. Stir in the floured/spiced Knotweed pieces and mix well, then pour the cake batter into the baking pan and spread evenly.
Topping: Place brown sugar, flour and spices into a food processor and pulse until well-blended; then add the cold butter pieces and pulse until the entire topping mixture is uniformly crumbly. Sprinkle the topping evenly over the batter.
Bake at 350ºF for 50-60 minutes or until a wooden toothpick inserted into the center of the cake comes out clean. Cool on a wire rack; serve warm. Makes 15 good-sized servings. Any leftovers can be stored in the refrigerator for use in the next few days or frozen for longer storage.
Russ Cohen's Go Anywhere Knotweed Squares
This is a shortbread-based dessert recipe that features the invasive species Japanese Knotweed (Polygonum cuspidatum).
The part of the plant used for this recipe are the young stalks when they're about 18-24 inches long
(they're typically at this stage in the Boston area around May 1).
Select the fattest stalks you can (at least 3/4 inch in diameter),
cut them at ground level, and lop off the top cluster of leaves.
Peel the very outer layer (which is stringy) off each stalk, and then they are ready to eat raw or use in this recipe.
Ingredients:
For bottom crust:
· 1 cup flour
· 1/3 cup confectioners sugar
· 1/3 cup butter (cold)
For filling:
· 2 eggs, lightly beaten
· 1 cup sugar
· 1/4 cup flour
· 1 teaspoon vanilla extract
· 1 teaspoon ground cinnamon
· 1/2 teaspoon allspice
· 1/2 teaspoon grated nutmeg
· 3 firmly-packed cups peeled Japanese Knotweed stalk pieces (chop or knead the peeled stalks into small pieces <1” long)
Preheat oven to 350ºF. Grease an 11” by 7” by 2” baking pan. Put crust ingredients into a food processor and pulverize until mixture resembles coarse crumbs.
Press into the bottom of the baking pan and bake at 350ºF for 12 minutes.
To make the filling, place all the ingredients except the Knotweed into a bowl and mix together; then stir in the Knotweed pieces.
Pour filling mixture over the warm crust and spread evenly. Bake at 350ºF for 35-40 minutes or until a toothpick stuck into it comes out clean.
Cool on a wire rack. Cut into brownie-sized pieces and serve warm.
Any leftovers can be stored in the refrigerator for use in the next few days or frozen for longer storage.
May, 2005
Russ Cohen's Burdock Bloom Stalk Bake
Ingredients:
4 cups cooked burdock bloom stalk rounds (see below)
1 cup parmesan cheese
2/3 cup bread crumbs
1/3 cup mayonnaise
2 T. vegetable oil
1/2 cup finely chopped onions (substitute wild onions or wild leeks if you have them)
2 cloves garlic, minced (can use an equivalent amount of wild garlic as well)
paprika
Collect at least a dozen Burdock bloom stalks (a.k.a. the main central stalk that will eventually
support the flowering side branches); get them when about 1-2 feet high and still in the process
of growing taller (way before the flowers show up); burdocks are usually at this stage
in the Boston area the first two weeks of June. Cut them as close to the ground as you can,
then strip off any attached large leaves and leaf stalks. Cut off the cluster of leaves at the top
of the stalk as well. When you get the bloom stalks home, peel or cut off the
outer rind (which tends to be stringy and bitter).
Then chop the peeled bloom stalks into rounds about 1/3 inch thick.
Drop the chopped burdock bloom stalks into an ample supply of boiling salted water
and boil until tender (10-15 minutes). Remove and drain.
Add the rest of the ingredients to 4 cups of the boiled burdock bloom stalks and combine well.
Spread in a pie pan or flat baking dish and sprinkle paprika over the top.
Bake at 350 degrees until bubbly (about 20 minutes). Serve hot with crackers (Triscuits work well).
Russ Cohen's Sassafras Candy
[Introductory Note regarding the safety of Sassafras, from "Wildman" Steve Brill's
Identifying and Harvesting Edible and Medicinal Plants in Wild (and not so wild)
Places (New York: Hearst Books, 1994, p.221): "The U.S Food and Drug Administration
removed sassafras from the health-food stores because astronomical quantities
of concentrated synthetic safrole caused cancer in rats.
Rats convert safrole, which is not carcinogenic, into a carcinogen. Humans do not.
Nevertheless, beer, with a carcinogenicity index fourteen times that of sassafras for rats,
is still on the market, and gourmet stores sell filè powder [made from sassafras leaves].
People have enjoyed sassafras in moderation for thousands of years with no ill effects
and consumed it in root beer before it was replaced by artificial chemicals.
I think sassafras is safe."]
This candy is sure to awaken pleasant childhood memories of buying root beer barrels
at the penny candy store. It can be made year-round, either by using stored previously
dug-up roots in the freezer or by going out and digging a fresh supply of roots.
[Sassafras is easily recognizable even in the winter; the green bark of its twigs stands out
among the other more muted colors. Just "scratch and sniff"; if you get a sweet,
lemony fragrance (a different aroma than the classic "root beer" flavor of the root bark),
then you've found it.] The key to making an intense-flavored Sassafras candy is to add the
root pieces near the end of the process rather than at the beginning, as otherwise
the volatile oil containing the flavor will be driven off while the liquid is being
heated to the "hard crack" candy stage.
Ingredients:
2 cups sassafras root pieces or bark (i.e., enough roots to yield at least
1/2 cup of pulverized bark peeled from the roots)
2 cups water
2 cups sugar
1 ¼ cups light corn syrup
1 tbsp. butter or margarine
one well-buttered large Pyrex baking dish or cookie sheet, with a rim of ½ inch or more
Lightly scrub roots in cold water to remove any residual dirt,
then peel the bark off the root pieces with a knife or carrot peeler.
Bring the water to a low boil and (optional: throw the peeled roots in and
simmer them for awhile to give the water a little preliminary flavor and color boost).
In the meantime, put the peeled root bark in a food processor and pulverize
it until the root is ground up quite fine. You should have at least 1/2 cup
of pulverized bark pieces when you're done (less will result in a
less intense flavor in the candy).
Pull out root pieces (if any) from the simmering water and add the remaining
ingredients to the liquid. Boil at high temperature and get a candy thermometer ready.
When the boiling liquid approaches a temperature of between 290-300 degrees, stir in the
pulverized root bark and mix well. The mixture will sizzle and drop in
temperature about 20-30 degrees as the moisture in the root bark boils off.
When the temperature of the mixture gets back up to between 300-310 degrees
(the so-called "hard crack" stage), remove from the heat and then pour it out
into the baking dish or cookie sheet and spread evenly. As the candy begins
to solidify, you may want to score its surface with a knife to help you
break it into uniform pieces later.
Store whatever you don't eat right away in tightly sealed glass jars
in a cool place, and it should retain its flavor and hardness for a year or more. (2/23/01)
Rustic Ruggelach
Dough Ingredients:
1/2 Tbsp. butter
8 oz. cream cheese
2 cups pastry flour
Mix together and sprinkle with water if necessary (makes a dry dough). Refrigerate.
Filling Ingredients:
1 cup wild jam (blackberry, mulberry, rose hip, etc.)
1 cup finely chopped wild nuts (hickory, black walnut, butternut, hazelnut, etc.)
or
1 cup chopped dried wild fruit (juneberries, apples, blueberries, etc.)
1 tsp. cinnamon
Add water as needed to make filling easy to spread.
Assembling the Ruggelach:
Divide dough in two parts - Roll each part into a circle and cut into 16
"pie-slice"-shaped wedges. Spread with filling and roll each wedge from
the outside toward the center. Place on greased cookie sheet, and bake
15 minutes at 350 degrees F.
Makes 32 small pastries (8-10 servings).
NOTE: This is a relatively "healthy" (i.e., not very sweet) dough recipe.
Adding some sweet fruit juice instead of water in this recipe, or using a
fruit-flavored cream cheese instead of regular cream cheese, might
help to liven things up a bit. (3/28/01)
Russ Cohen's Fall Harvest Muffins
You'll want to use acorns from the so-called "soft" oak species (White Oak, Swamp White Oak,
Chestnut Oak, Post Oak, Bur Oak, etc,. i.e., the species with rounded lobes on their leaves),
as they are lower in tannic acid and therefore less bitter than acorns from the so-called
"hard" oak species (Black Oak, Scarlet Oak, Northern Oak, Pin Oak, etc., all of which have
leaves with pointy lobes). To make acorn flour, shell the acorns, and (if their bitterness is
still too strong for your taste) leach some of the tannic acid out by boiling the shelled nuts
for a few minutes in several changes of water. Dry the nut meats out (e.g., by spreading them
out on a cookie sheet and sticking them in a warm oven for a few hours), then pulverize in a
food processor until it's the consistency of flour or a fine-grained meal.
The delicious and distinctive flavor of the acorn flour will be quite evident in the muffins
despite the fact that it makes up only 1/3 of the flour used in this recipe.
Dry ingredients:
1 1/3 cup white flour (OK to mix 1/2 and 1/2 with corn meal)
2/3 cup acorn flour (prepared as described above)
2 tsp. baking powder
1/2 cup light brown sugar
3/4 tsp. salt
Wet ingredients:
2 eggs
1 cup milk
1/3 cup melted butter
1/4 cup maple syrup
Fruit and nuts:
1 cup peeled, chopped apples
1 cup sliced raw cranberries
1/2 cup chopped hickory nuts
Preheat oven to 400 degrees F. Get well-greased muffin tins ready. Mix dry ingredients
together in one bowl; mix wet ingredients together in another bowl (beat eggs before
adding); then mix dry and wet ingredients together with just a few strokes (do not overmix;
lumps are OK), quickly fold in fruit and nuts, then spoon mixture into muffin tins, filling up
each compartment about halfway (add water to any surplus compartments to protect the pan
and help keep the muffins moist while baking).
Bake at 400 degrees for 25 minutes. Makes 18 small or 12 large muffins.
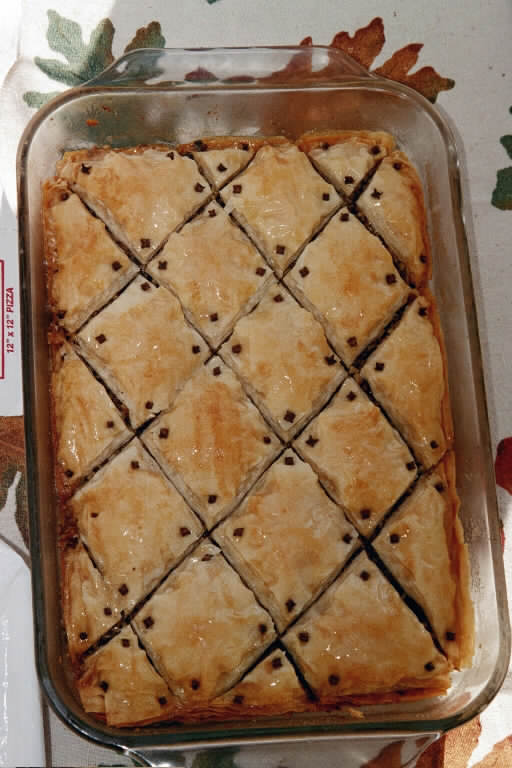
Black Walnut Baklava
(NOTE: You’ll need phyllo dough for this recipe; it usually comes in 1 lb. packages and is found in the frozen foods section of most supermarkets and upscale grocery stores. You’ll need to thaw out the dough before using – overnight in the ‘fridge or 5 hours at room temperature. Leave in the box until ready to use. You’ll need a pastry brush, too.)
Preheat oven to 325ºF.
Butter the bottom and sides of a 9”x13” baking pan. Coarsely chop (or finely grind, according to your preference) 3 cups of black walnuts. You might want to lightly toast the nuts first to help bring out their aroma and help retain their crunchiness in the final product.
Stir together in a small bowl:
· 1/4 cup sugar
· 1 tsp. grated lemon zest (outside peel)
· 1/2 tsp. ground cinnamon
Melt 1/2 lb. (two sticks) of butter. Roll out the phyllo dough flat on a smooth work surface. Trim half the phyllo into 9”x13” inch sheets, then put the remaining dough back in the package and save for another use. Place two sheets at a time into the bottom of the baking pan, then brush with melted butter. Repeat this twice for a total of six sheets; then sprinkle on top of that half of the chopped nuts and half of the sugar/lemon zest/cinnamon mixture. Lay down another 3 pairs of sheets, brushing each pair with melted butter before putting down the next. Sprinkle over them the remaining nuts and sugar/lemon zest/cinnamon mixture. Cover that with all the remaining phyllo sheets (one pair at a time, brushing each pair with melted butter before applying the next). Brush the top with the remaining butter.
Using a sharp serrated knife, cut through all the layers to make 2”- wide diamonds or squares
(make sure to do this before baking). Pin down each cut corner with a whole clove
(you’ll need about 1 1/2 Tbsp. of whole cloves for this task).
Bake at 325ºF for 30 minutes, then reduce oven to 300ºF and continue to bake until the baklava is golden brown,
about 30-60 minutes.
In the meantime, combine the following five ingredients in a saucepan:
· 1/2 cup sugar
· 1 cup water
· 3/4 cup honey
· 1 Tbsp. fresh lemon juice
· zest (outside peel) of one orange, removed in large strips
Bring this mixture to a gentle boil and then simmer, uncovered, for 15 minutes.
Strain the hot syrup and pour evenly over the baked baklava.
Allow to cool completely (at least four hours) to room temperature before serving.
Russ Cohen's Multi-seasonal Soup
The name for this soup is due to the fact that it's impossible to gather all the wild ingredients needed for it in one season. Young Stinging Nettle greens are available in April (and occasionally in Oct-Nov.), while beach peas are at their best in early summer and most wild mushrooms are most readily available in mid- to late summer. Fortunately, boiled nettle greens freeze easily (I just throw the greens and the water I boiled them in into a 1-qt. plastic container and throw it into the freezer; it will keep a year or more). Also, many species of mushrooms (such as the boletes recommended for this recipe) dry very well (their flavor actually improves on drying) and will keep in tightly sealed glass jars for a year or more. I use an electric food dehydrator to dry mushrooms, but old-fashioned methods such as slicing thinly and stringing them on a piece of thread and hanging in a warm dry location for a few days will also work. So I tend to make this soup around the 4th of July, when I can get fresh beach peas. I'll use the previous season's nettle greens and the previous year's dried mushrooms.
Ingredients:
- 1 quart boiled young Stinging Nettle greens (boil the greens in a small amount of water about 5 minutes; drain but save the boiling water)
- 1 cup shelled Beach Peas ( you'll need to start with approx. 1 quart of unshelled pods to end up with 1 cup of peas; I like to pick the pods while they're still green in color so the peas inside will be nice and tender)
- 2 cups diced potatoes
- 2 cups diced onion
- 1 quart soup stock , made from mushroom soaking water and/or nettle boiling water and/or vegetable bouillon cube
- 1/4 tsp. Paul Prudhomme's seasoning
- 1 cup diced green pepper
- 1/2 tsp. File powder (file powder is made from dried and powdered young sassafras leaves; you can make your own or purchase at a specialty foods store)
- 1 1/2 cups diced fresh wild mushrooms (Boletes work well, e.g., Boletus bicolor); if using dried mushrooms, use 3/4 cup and soak first in warm water in a covered bowl for 20 minutes; squeeze excess water out of mushrooms, but save that and the soaking water to add to the soup stock
To prepare:
Saute onions , potatoes and mushrooms (if you're using fresh) in 1 1/2 tbsp. Canola oil as if you were making homefries.
When about 1/2 done, add the beach peas and green pepper (if you're using dried and rehydrated mushrooms, add them in at this time) and saute for a few minutes more.
Add soup stock , file powder and seasoning and simmer ingredients about 1/2 hour until everything is soft and well-blended.
Add salt and black pepper to taste; grate a little parmesan cheese on each bowl just before serving.
Makes about 12 one-cup servings.
The subtle multiple seasonings helps the wonderful flavor of the wild ingredients shine through. © 8/14/96
Last update: 3/16/13
Foraging articles from Mass. Wildlife Magazine
Schedule of Russ's Edible Wild Plant Walks/Courses
Russ Cohen's Biography
NEW! Comprehensive (as of 1999) Edible Wild Plant etc. Bibliography, plus updated excerpt
List of Organizational Sponsors