Remembering the Rutland - Modeling the Rutland
Rutland Hopper 10009 in HO Scale
by Bill Badger
Bill started with a Bowser model of the Pennsy GLa.
|
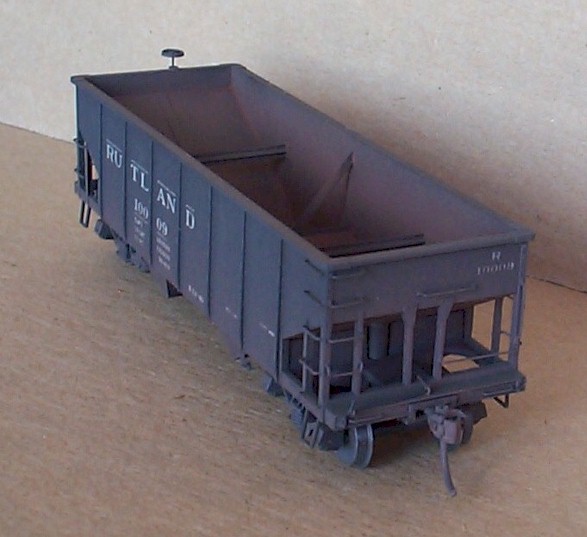
Bill's finished model of Rutland 10009 |
I started with an undecorated Bowser PRR GLa. I think the overall dimensions are pretty close.
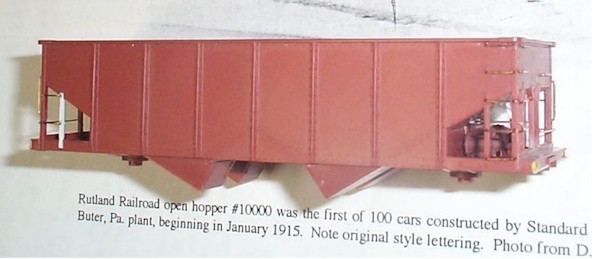
Two references with Standard Steel hopper drawings that proved useful were the 1909 and 1919 Car Builders Dictionary.
|
|
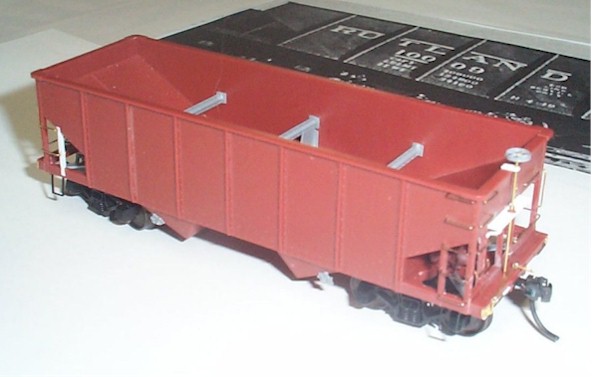
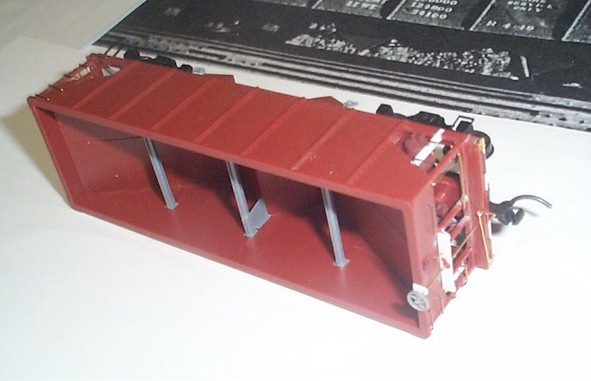
These two views (above) clearly illustrate many of the added details. Bill later changed the interior braces, particularly the middle one, after these images were made. |
I shaved off the cast on grabs, hopper latches and associated rivet strips, stirrup steps and chain loops next to the steps. I also removed a few selected rivets on the sides following drawings in the 1911(?) Car Builder's Cyclopedia. The bottom of the end sills hang down on the GLa while they are flush on the Rutland car, so I filed the bottom of the end sills flush and removed the poling pockets.
The diagonal underframe braces at the car ends go in the opposite direction on the GLa, so I cut those out also, leaving the brackets for the brake components.
Finally, starting at the top, I carefully sliced behind the triangular gussets of the end braces and then cut the top and bottom of the braces free. I was able to preserve the braces intact. I scraped and sanded all the places where parts were cut off. This completed the "removal" phase.
|
Another look at the work-in-progress. |
To get some of the parts needed to model the Rutland car, I cannibalized a Tichy USRA hopper kit. Perhaps someone can convince Don Tichy to produce a hopper detailing kit with an underframe, hopper door latches, interior braces, brake platform and maybe K-brakes. In the meantime, pick up a complete Tichy kit. Glue a strip of styrene to the bottom edge of the end sill and then add new poling pockets. I used Precision Scale pockets, but there may be other, better choices. Install the Bowser underframe and add diagonal underframe braces from the Tichy underframe.
Apply the brake parts. I used the AB brakes that came with the Bowser kit, but the K brakes from the Tichy kit would be another option. I made a bipod bracket to hold the upper end of the brake lever over the cylinder, based on photos and an earlier Standard Steel hopper drawing. I can't guarantee its accuracy, but it looks good.
It is hard to find a good picture of the Rutland brake platform, but it appears to be quite long, so I used a bit of strip styrene and added braces and the ratchet sliced off the Tichy platform. Remember the end paired braces saved in the removal stage? Cut each pair into two separate pieces and file the cut edge of the gussets flush with the vertical member. Reuse the two right hand braces that have the nut-bolt casting for the long horizontal grabs and pick the two best left braces. Glue a right and left single brace on each end centered over the coupler pocket. After a bit of trial and error, I settled on a spacing of 15" apart.
If photos of the brake platform are rare, photos of the interior bracing are even rarer. Working from the Car Builder's drawings, and with some guidance from Glenn Annis, I made some assumptions about the bracing. When the first photograph of the prototype's interior surfaces to prove me wrong, I'll just load the car with coal. I used two Tichy horizontal braces inside the car on the second rib from each end and two long diagonal 1" x 6" braces in the middle. They are visible in the image of the finished model (at the top of the page).
Finally, I added the Tichy hopper door latches, wire grabs, Detail Associates stirrups, the brake wheel and a retainer valve.
After a conversation with Mike Sparks about how to achieve a rusty look, I primed the car with Poly Scale Roof Brown. Then I painted it loco black, but intentionally didn't try to get complete coverage. I then lettered it with CDS dry transfers. This was followed by a grimy black dusting and Boxcar Red along the bottom and a bit inside. I did not paint the interior with loco black at all.