Remembering the Rutland - Remembering the Milk Trains
Under Construction:
Rutland 337 (or 338)
HO Scale Model, Images and Text by Jim Otto
Part 1 Inspiration...
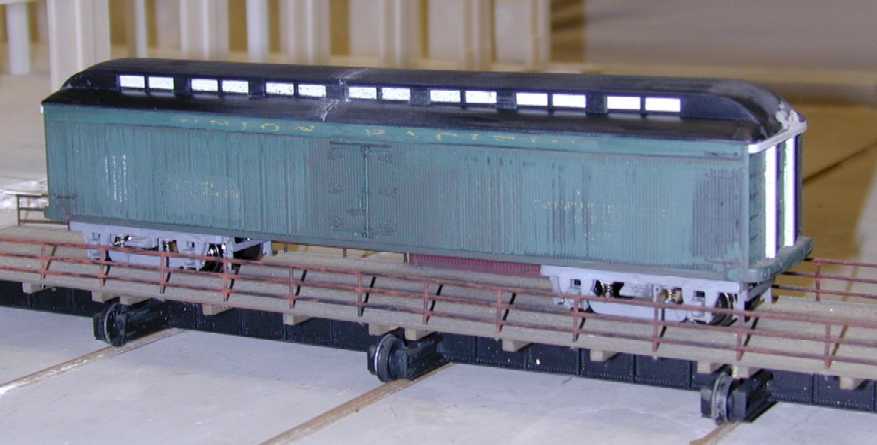
I'm building this car out of an MDC express reefer body. The roof is from an MDC passenger car (something out of my scrapbox), it was broken in several places, but gluing it back together was easy. The trucks are Precision Scale plastic kits, they initiated the project. I assembled one of the trucks and put in under one end of a passenger coach that had Central Valley trucks under it. The Precision Scale truck made that end of the car sit about three feet higher. So I started to look around to find something they would look good under, and I found this project. I know it's not quite Rutland enough, but it certainly could pass as a temporary substitute. If I had a better roof, and really wanted to spend the time, I think a reasonable Rutland car could be made from it. What do you think?
-Jim Otto
| Part 2 - Improving the ends...
-Jim Otto |
 Here's the next photo of the milk car
I've been working on. I originally intended to make this model similiar to the Rutland
cars. Now that Jim Dufour has given me some basic measurements, and the model is almost
exact, I suppose it should become a Rutland car [now you're talking, Jim! -jrd]. So far,
I've done a basic underbody, truss rods (even though the queenposts look too short), and
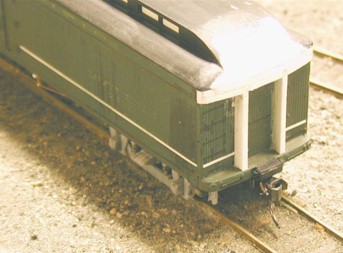
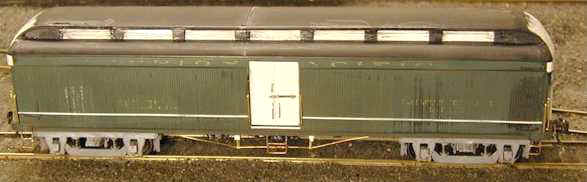
brake gear from CalScale. The ends were the biggest challenge. On the
first photograph (above) you'll notice that I didn't have the letterboard width wrapped
around the end yet. At that time the crash posts were also too small. I added more strip
plastic of various sizes to build up these areas and a little white putty to shape the
roof to the more rounded end these cars had. About the only major thing left are the
doors. I'll send along photos of how I build these. First, I'll have to mill out the old
one.
Here's the next photo of the milk car
I've been working on. I originally intended to make this model similiar to the Rutland
cars. Now that Jim Dufour has given me some basic measurements, and the model is almost
exact, I suppose it should become a Rutland car [now you're talking, Jim! -jrd]. So far,
I've done a basic underbody, truss rods (even though the queenposts look too short), and
brake gear from CalScale. The ends were the biggest challenge. On the
first photograph (above) you'll notice that I didn't have the letterboard width wrapped
around the end yet. At that time the crash posts were also too small. I added more strip
plastic of various sizes to build up these areas and a little white putty to shape the
roof to the more rounded end these cars had. About the only major thing left are the
doors. I'll send along photos of how I build these. First, I'll have to mill out the old
one.Part 3 - Cutting out the door openings...
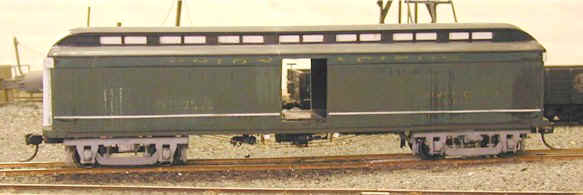
This time I tried something different. I used an X-Y movable vise on my drill press with a small end mill in the chuck. At a slow speed, it cut the plastic without melting it. I plunged the end mill into the center of the existing door and slowly milled out the old reefer door. The next step was to file the openings square. The milling operation left a straight edge, but with rounded corners. According the the photos I've been studying for this project, at this point this model is becoming Rutland #337. The doorway starts just under the roofline and goes down to what looks to be about 6 inches from the bottom. I'm guessing this because when I scaled out the sides to apply the belt rail, I figured it to be at about two feet from the bottom of the side. Next, I'll make new doors and hardware, add all the handrails, and finish up with paint and decals.
-Jim Otto
Part 4 - Building the doors...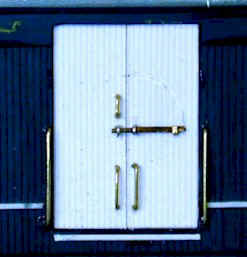 I made the doors out of scribed styrene sheet. I put a couple of plastic bars across the back of the door openings to have something to glue the doors to. I used evergreen passenger car siding, just thick enough for sturdiness and thin enough to be slightly behind the car siding. The hardware is just bits of brass wire bent and installed, and a couple of Detail Associates eye bolts. I've been finding that, working with the photos from Nimke's Volume I and with the photos I've found on this site, some of the details are hard to discern. I'm just trying to portray #337 as best as I can. I think the end pieces I made should curve upwards slightly, but even that is hard to tell from the photos as most are shot from the ground up and that makes an outward curved surface also look upward curved. If anybody feels like making scale drawings . . . . -Jim Otto |
Part 5 - Last stop before the paint shop...
I finished the project by making steps out of flat brass wire stock (Detail Associates). Next up will be paint and decals, I plan to use a green to match my factory painted brass cars.
-Jim Otto
Part 6 - Done!
(or is it?)
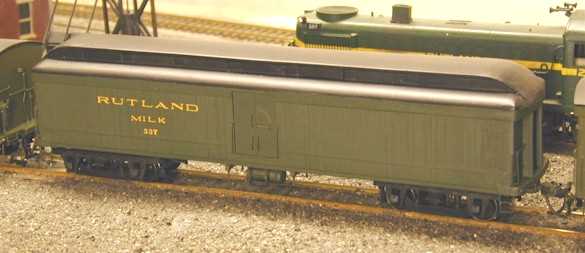
I started this project quite some time ago, and now it's done (at least for now). I'm sure that things could have been even more accurate: the ends are a little off and the side sheathing shouldn't have the side sill showing along the bottom. Scratchbuilding would have helped these small discrepencies, but I think that it has the right Rutland flavor, and I'm happy with the end result. I painted it with a mixture of Floquil military and railroad paints. I found a medium green that looked pretty close, so I gave it a coat of that (thinned and gloss and a little flat added). The color was just a hair too light. So I mixed a little Pullman Green into it and gave it a second coat, I liked this color, it seemed a pretty close match to my two Alco Models NYC cars and the Railworks cars that I have. I sprayed the trucks and roof black.
Ray Muntz was kind enough to make excellent decals just for us SRF's (slobbering Rutland freaks). I plan to do the roof with water based black paint and tissue paper to simulate tar paper and better hide the seams. I've done this on several caboose models with excellent results. If I can find some extra cash, I plan to pick up some of the Railworks brass Rutland milk car trucks, I don't really like the Precision Scale ones that I used (either that or I locate "wimpy" springs to solve their problem). I plan to start another "serial" shortly, hopefully somebody else will try one too.
-Jim Otto
Note: Click to see photos of the prototype cars: 337 and 338.